Published 1 Jul 2022
Best Practices for Welding Wire Spool Selection and Set-Up

Best Practices for Welding Wire Spool Selection and Set-Up
Original article courtesy of Hobart Filler Metals - hobartbrothers.com
Filler metal packaging, such as spools, may seem like an inconsequential part of the welding operation — a simple way to deliver the welding wire to the joint. However, the type and size of spool a company selects can have a significant impact on productivity, quality and cost.
Not only is it important to make the right selection for the application, but it’s also critical to set up the welding wire spool properly to prevent problems related to poor wire feeding. Such issues can be far-reaching and lead to extra costs for replacing welding consumables as well as downtime for troubleshooting. With labor already accounting for around 85% of the total cost of a welding operation, maintaining arc-on time is key to being efficient and profitable.
How to choose welding wire spools
The specific type of welding wire spools varies by filler metal manufacturer; however, there are typically three options: steel, plastic and fiberboard.
Each of these spools includes a hub that mounts on the wire feeder by way of a spindle assembly. Depending on the filler metal manufacturer and the type of wire being used — solid, metal-cored or flux-cored — spool weights for industrial applications generally range from 33 to 60 pounds, but can be as light as 12 pounds. These ranges are true for steel wire; aluminum wires have different standard packages. Typically, heavier weights of welding wire are packaged on fiberboard spools due to their sturdy structure.
There are several factors that determine the right welding spool for the application. In some cases, the decision may be made based on what is available for a given wire type and size. In other instances, sustainability may be a factor. For companies committed to implementing and maintaining recycling initiatives, a plastic or steel spool may be preferred over a fiberboard spool.
Portability and productivity can also have major impacts on spool selection — particularly when choosing a specific weight of welding spool. If the welding will take place in a stationary location, using a bench-style feeder, it is often beneficial to purchase a larger spool to minimize downtime for changeover. If the operation requires the welding operator to change locations, a smaller spool is better to simplify portability. In this case the spool would be added to a suitcase-style feeder.
Step-by-step setup
Proper welding spool setup for MIG or flux-cored is key to preventing unnecessary downtime for troubleshooting or fixing problems. Incorrect setup can lead to such issues as poor wire feeding, bird-nesting (a tangle of wire in the drive rolls), burnback (the wire fusing in the contact tip) and wire stuttering that leads to poor arc stability.
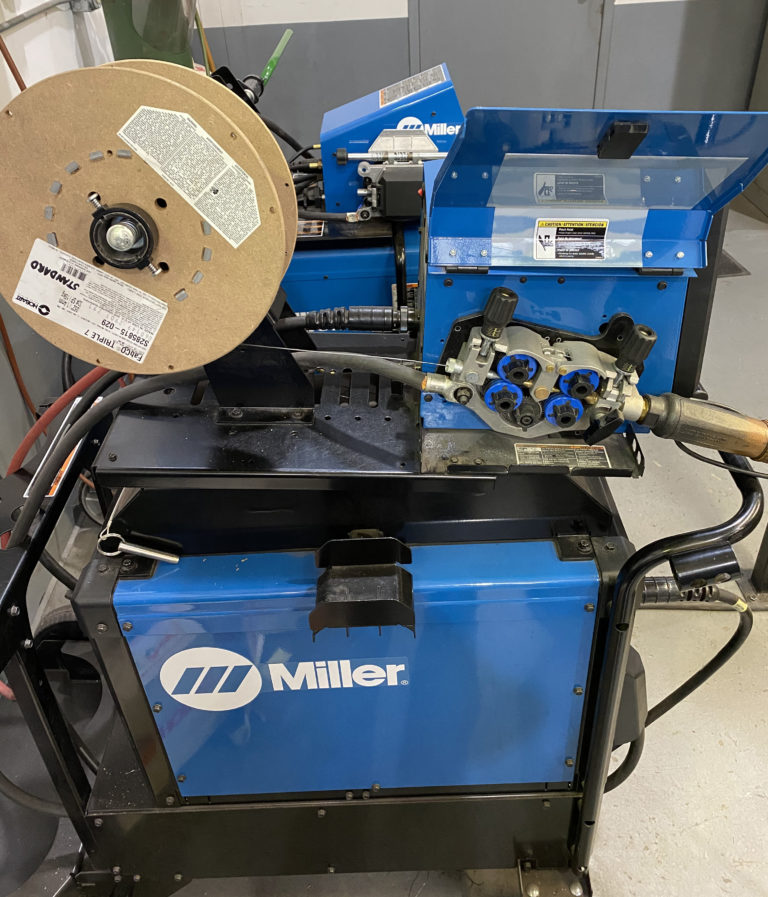
As a matter of best practice, follow these steps for setting up a spool on a bench-style feeder.
- Holding the spool from below (rather than by the rim), place it on the spool assembly, aligning the hole on the spool with the dowel on the wire feeder. This helps maintain the wire tension on the feeder. If it isn’t preset, set the hub tension on the spool to ensure it doesn’t unwind when welding stops.
- Be sure to account for the inlet guide angle to determine the direction the wire should feed. If the guide is at an angle, the wire should feed from over the top of the spool. If the gun is flat, the wire needs to feed from underneath the spool. Proper wire direction helps prevent drive roll slippage, excess wear on inlet guides and possible bird-nesting. Put the retaining clip in place to secure the spool.
- Open the drive rolls via the knob on the wire feeder, and be sure to have the correct ones for the type of wire being used. Typically, gas- and self-shielded flux-cored wires, and metal-cored wires use V-knurled drive rolls. Solid wires pair with V-groove drive rolls. Aluminum wires use U-groove drive rolls.
- If the spool of wire is new, snip the short, bent end of the wire that has been secured to the spool so the wire is straight. Take care to keep a good hold on the wire so that it doesn’t unspool. Feed the wire through the first inlet guide, the first set of drive rolls, the intermediate guide through to the second set of drive rolls and into the power pin at the back of the MIG gun. As with the drive rolls, be sure to have the correct type and size of inlet guide. Use plastic guides for aluminum wire and steel guides for other styles of wire. Inlet guides usually come with drive rolls and are designed to be slightly larger than the diameter of wire.
- Close the feeder housing on the wire feeder and set the drive roll tension by turning the knob on the wire feeder. A good rule of thumb is to set the tension until it is one half turn past the wire slipping. Avoid overtightening the drive rolls, as this can deform the wire and lead to mechanical wear of the contact tip, arc wander and other feeding issues.
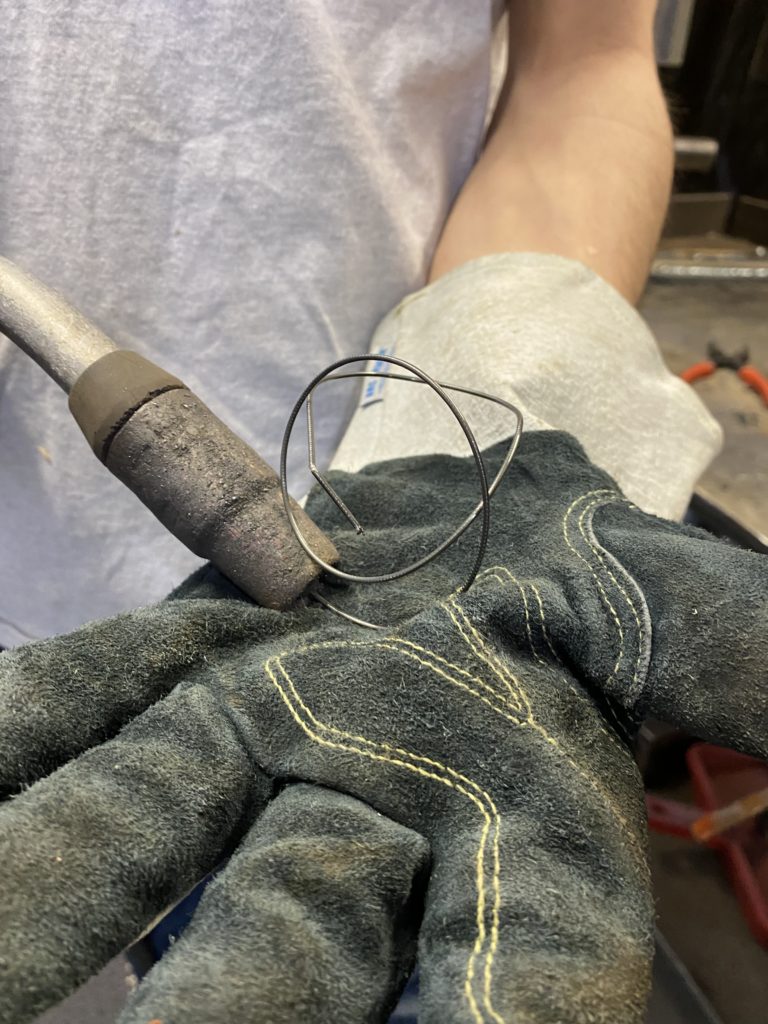
- Jog the wire until it feeds through the length of the MIG gun. Place the contact tip over the wire and tighten. Then add the nozzle. Test the drive roll tension by feeding the wire into a gloved hand while curling the wire into a small ball. The wire should feed smoothly without slipping.
Storing spools
In addition to selecting the most appropriate spool and setting it up properly, it’s important to protect the welding wire on it through proper storage. After purchasing a new spool, keep it in its original, intact package and store in a cool, dry area. This helps prevent moisture pickup that could introduce hydrogen into the weld, potentially leading to hydrogen-induced cracking, porosity and other weld discontinuities and defects. If possible, remove the spool after welding and place it in its original package. If that is not feasible, it’s best to cover the spool while it is still on the wire feeder.
And, as with any aspect of the welding operation, contact a trusted filler metal manufacturer or welding distributor with any questions about welding spools or other filler metal packaging.
